Vray Elements in After Effects
 Tuesday, January 4, 2011 at 11:22AM
 Although I've known about render elements since their inception back in 3dsmax 4, I've only really been working with split out render elements for a couple years or so.
The idea seems like a dream right? Render out your scene into different elements and give control of different portions of the scene so that you can develop that final "look" at the compositing phase? However, as I looked into the idea at my own studio, it's not that simple. This is a history of my adventure of adapting render elements into my own workflow.
The Gamma Issue
The first question for me as a technical director is "Can I really put them back together properly?" I've met so many people who tried at one point, but got frustrated and gave up. Its a hassle and a bit of an enigma to get all the render elements back together properly. One of the main problems for me was that you can't put render elements back together if they have gamma applied to them. I had already let gamma into my life. I was still often giving compositors an 8bit image saved with 2.2 gammed from 3dsmax. So for render elements to work, I need to save out files without gamma applied.
Linear Workflow
Now that your saving images out of max without gamma, you don't want to save 8 bit files since the blacks will get crunchy when you gamma them up in composite. So you need to save your files as EXR's in 16 bit space for render elements to work. You also need to make sure no Gamma is applied to them. Read this post on Linear Workflow for more on that process.
Storage Considerations
With the workflow figured out, you are now saving larger files than you would on a old school 8 bit workflow. Also, since your splitting this into 5-6 render element sequences, your now saving more of these larger images. Make sure your studio IT guy knows you just significantly increased the storage need of your project by many times
Composite Performance
So now you got all those images saved on your network and you figured out how to put them back together in composite, but how much does this slow down your compositing process? Well if you are your own compositor, no problem. You know the benefits, and probably won't mind the fact that your now pulling do 5-6 plates instead of one. You have to consider if the speed hit is worth it. You should always have the original render so the compositor can skip putting the elements back together at all. (Comping one image is faster than comping 5-6.) I mean, If the compositor doesn't want to put them back together, and the director doesn't know he can ask to affect each element, why the hell are you saving them in the first place right? Also, if people aren't trained to work with them, they might put them back together wrong and not even know it. Finally, to really get them to work right in After Effects, you'll probably have to start working in 16 bpc mode. (Many plugins in AE don't work in 16 bit)
After all these considerations, it's really up to you and the people around you to decide if you want to integrate it into your workflow. It's best to practice it a few times before throwing it into a studios production pipeline. If you do decide to try it out, I'll go over the way that I've figured out how to save them out properly and how to put them back together in After Effects so that you can have more flexability in your composite process.
Setting up the Elements in After Effects
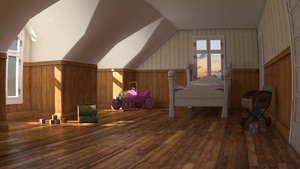
I don't claim to be any expert on this by far, so try to cut me some slack. I'll go over how I started working with render elements specifically in After Effects CS3. I'm using this attic scene as my example. It's a little short on refraction and specular highlights, but there are there, and they end up looking correct in the end.
Global Illumination, Lighting, Reflection, Refraction, and Specular.
I use just these five elements. Add Global Illumination, Lighting, Reflection, Refraction and Specular as your elements. It's like using the primary channels out of Vray. You can break up the GI into diffuse and multiply Raw GI, and the Lighting can be created from Raw Lighting and Shadows, but I just never went that deep yet. (After writing this post, I'll probably get back to it and see if I can get it working with all those channels as well. The bottom line is that this is an easy setup, so call me a cheater.
Sub Surface Scattering
I've noticed that if you use the SSS 2 shader in your renderings, you need to add that as another element. Also, it doesn't add up with the others so It won't blend back in. It will just lay over the final result.
I usually turn off the Vray frame buffer since I've had issues with the elements being saved out if that is on. I use RPManager and Dealine 4 for all my rendering and with the Vray frame buffer on, I've had problems getting the render elements to save out properly.
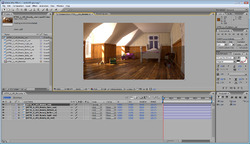
Bring them into After Effects
 I'm showing this all in CS3. I'm working with Nuke more often and hope to detail my experience there too in a later post. Load your five elements into AE. As I did this, I ran into something that happens often in After Effects. Long file names. AE doesn't handle the long filenames that can be generated with working with elements. So learn from this and give your elements nice short names. Otherwise, you can't tell them apart.
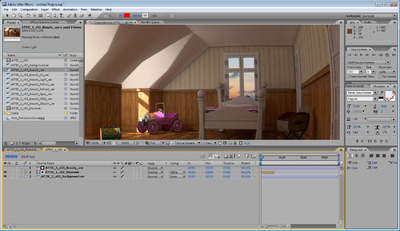
 Before "Preserve RGB"Next make a comp for all the elements and all the modes to Add. With addition It doesn't matter what the order is. In the image to the left I've done that and laid the original result over the top to see if it's working right. It's not. The lower half if the original, the upper half is the added elements. The problem is the added gamma. After Effects is interpreting the images as linear and adding gamma internally.
 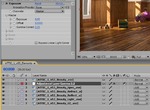 Adding Final GammaSo now when the are added back up, the math is just wrong. The way to fix this is to right click on the source footage and change the way it's interpreted. Set the interpretation to preserve the original RGB color. Once this is done, your image should now look very dark. Now that the elements are added back together we can apply the correct gamma once. (And only once, not 5 times.) Add an adjustment layer to the comp and add an exposure effect to the adjustment layer. Set the gamma to 2.2 and the image should look like the original.
Dealing with Alpha
 Next the alpha needs to be dealt with. The resulting added render elements always seem to have a weird alpha so I always add back the original alpha. One of the first issues is if your transparent shaders aren't setup properly. If your using Vray, set the refraction "Affect Channels" dropdown to All channels.
Pre-comp everything into a new composition. I've added a background image below my comp to show the alpha problem. The right side shows the original image, and the left shows the elements resulting alpha. So I add add one of the original elements back on top, and grab it's alpha using track matte. Note that my ribbed glass will never refract the background, just show it through with the proper transparency.
When this is all said and done, the alpha will be right and the image will look much like it did as a straight render. See this final screenshot.
OK, remember why we were trying to get here in the first place? So we could tweak each element right? So lets do that.  8 bit Failing When AdjustedLets take the reflection element and turn up it's exposure for example. Select that element in the element pre-comp and add >Color Correct>Exposure. In my example, I cranked the exposure up to 5. This boosts the reflection element very high, but not unreasonable. However, since After Effects is in 8 bpc (B-its P-er C-hannel) you can see that the image is now getting crushed.
 So, now we need to switch the comp to 16 bpc. You can do that by holding ALT while clicking the 8bpc under the project window. Switch it to 16 bpc and everything should go back to normal. But note that were now comping at 16 bit and AE might be a bit slower than before. This is only a result of cranking on the exposure so hard. You can avoid this by doubling up the reflection element instead of cranking it with exposure. Keep in mind that many plugins don't work in 16 bit mode in after effects.
That's about it for after effects. I'm curious how CS5 has changed this workflow, but we haven't pulled the trigger on upgrading to CS5 just yet. I'm glad because I've been investigating other compositors like Fusion and Nuke. I'm really loving how Nuke works and I'll follow this article up with a nuke one if people are interested in it.


