

Vray Render Elements into Nuke
;) As a follow up to the article I wrote about render elements in After Effects, this article will go over getting render elements into The Foundry's Nuke.
As a follow up to the article I wrote about render elements in After Effects, this article will go over getting render elements into The Foundry's Nuke.
I've been learning Nuke over the last few months and I have to say it's my new favorite program. (Don't worry 3dsmax, I still love you too.) Nukes floating point core and it's node based workflow make it the best compositor for the modern day 3d artist to take his/her renderings to the next level. (In my opinion of course.) Don't get me wrong, After Effects still has a place in the studio for simple animation and motion graphics, but for finishing your 3d renders, Nuke is the place to be.
There a many things to consider before adding render elements into your everyday workflow. Read this article on render elements in After Effects before making that decision. You also might want to look over this article about linear workflow too.
Nuke and Render Elements

;) Drag all of your non gamma corrected, 16 bit EXR render elements into Nuke. Merge them all together and set the merge node to Plus. Nuke does a great job at handling different color spaces for images, and when dragging in EXR's, they will be set to linear by default.
Drag all of your non gamma corrected, 16 bit EXR render elements into Nuke. Merge them all together and set the merge node to Plus. Nuke does a great job at handling different color spaces for images, and when dragging in EXR's, they will be set to linear by default.
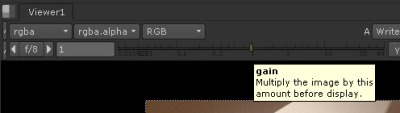
Nuke applies a color lookup in the viewport not at the image level, so our additive math for our render elements will be correct once we add all the elements together. (If it looks washed out, your renders probably have gamma baked into them from 3dsmax. Check your output gamma is set to 1.0 not 2.2) If you want to play with the viewport color lookup, grab the viewport gain or gamma sliders and play with them. Keep in mind that this will not change the output of your images saved from Nuke. This is just an adjustment to your display.
Alpha
;)
;) After you add together all the elements, the alpha will be wrong again. Probably because we are adding something that isn't pure black to begin with. (My image has a gray alpha through the windows.) Drag in your background node and add another Merge node in Nuke. Set this one to Matte. Pull the elements into the A channel and pull the background into the B channel. If you do notice something through the Alpha it will probably look wrong. The easiest way to fix this is to grab the mask channel from the new Merge node and hook it up to any one of the original render elements. This will then get the alpha from that single node, without being added up.
After you add together all the elements, the alpha will be wrong again. Probably because we are adding something that isn't pure black to begin with. (My image has a gray alpha through the windows.) Drag in your background node and add another Merge node in Nuke. Set this one to Matte. Pull the elements into the A channel and pull the background into the B channel. If you do notice something through the Alpha it will probably look wrong. The easiest way to fix this is to grab the mask channel from the new Merge node and hook it up to any one of the original render elements. This will then get the alpha from that single node, without being added up.
Grading the Elements
;) That's pretty much it. You now can add nodes to each of the separate elements and adjust the look of your final image. If you read my article about render elements and After Effects, you will remember that I cranked the gain on the reflection element and the image started to look chunky. You can see here that when I put a Grade node on the reflection element and turn up the gain, I get better results. (NOTE: my image is grainy due to lack of samples in my render, not from being processed in 8 bit like After Effects does.)
That's pretty much it. You now can add nodes to each of the separate elements and adjust the look of your final image. If you read my article about render elements and After Effects, you will remember that I cranked the gain on the reflection element and the image started to look chunky. You can see here that when I put a Grade node on the reflection element and turn up the gain, I get better results. (NOTE: my image is grainy due to lack of samples in my render, not from being processed in 8 bit like After Effects does.)
This is just the beginning. Nuke has many other tools for working with 3d renders. I hope to cover more of them in later posts.
 3ds max, CGI, Compositing