How many times a day do you start a new scene in 3ds max and switch the renderer to Vray and set up all your default settings? Are you ever in the middle of animating, only to realize that you forgot to switch your framerate to 24 fps? I have the answer to those problems and more.
One of the simplest and most useful things about 3dsmax is a secret file called maxstart.max. It doesn't exist when the program is installed, but all you have to do is create it in your default \Scenes folder, and when max is started or reset, this file is loaded. So start up 3ds max and lets set some good startup defaults going.
 Set the default Framerate
I don't know about you, but almost everything I do is at 24 frames per second. (Maybe cause we all want to believe that everything we do is a little film.) Every once in a while I do something for PAL in which it becomes 25 fps, but 24 is my default 90% of the time. Open the time configuration dialog and set your framerate.
Set your default Animation Range
You'll notice that when you switch from 30 to 24 fps, the time range with shorten to 80 frames. You might as well set this to what you want also. I want to start with 6 seconds of time. (24*6 = 144 frames)
Set Your default Gamma
I'll do a whole entry on gamma at another time. I mention this now since my render settings will be taking this into account in the next section.
- Gamma = 2.2
- Affect Color Selectors = True (Duh)
- Affect Material Editor= True (Of course)
- Input Gamma = 2.2 (To compensate for images comming in as textures)
- Output Gamma = 1.0 (Because I want my images linear space for compositing)
Set up your default Renderer
Now I'm sure your using something other than the max renderer (I love you baby. We went threw some good times together back in the day, but I outgrew you years ago.) so go ahead and set that up, along with any default settings you like. Here's my defaults and a brief explanation of why. If you have any questions, hit me up in the forum section.
- Enable Built in Frame Buffer (Cause tracking the mouse while rendering is awesome)
- GI Environment = On (Cause my background image is NEVER my GI source)
- GI Environment Color = White (I don't like to put any color in without thinking about it)
- GI Environment Multiplier = .25 (I use a gamma of 2.2 and therefore don't need the GI so high)
- Color Mapping Gamma = 2.2
- Color Mapping Don't Affect Colors = True (This allows Vray to consider 2.2 gamma correctly, without adding it to the final image. Press the sRGB button when the frame buffer comes up to see the image with and without 2.2 gamma)
- GI = On
- Ambient Occlusion = On (Hell why not, adds a little extra detail)
- Irradiance Map, Custom, -3 -3 (Because when you start working on a scene, you don't need to run through 3 pre-pass stages to see what the hells going on. Save yourself some time would ya.)
Set up your default 3D Scene
I like to always start with a matte shadow ground plane so shadows have someplace to land. Also, don't leave your background completely black. It's very mis-leading when rendering models. I like to throw in some kind of gradient or something so that's lighter, but not completely white either. I find a light warm color works pretty good.
Set up your Material Editor
Finally, if set up your material editor to have some Vray materials to work with. For this, I'll show you a little trick so that the reset material editor slot command fills it with Vray materials instead of max materials.
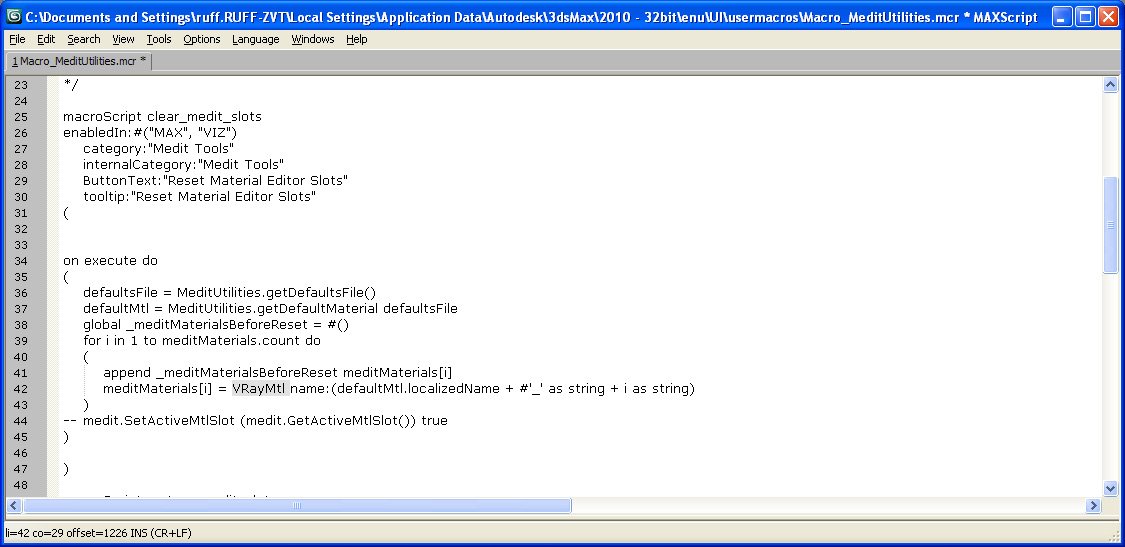
Go to Customize>Customize User Interface>Menus, From there, navigate the right drop down to Medit - Utilities. This shows you the menu for the material editor's Utilities menu. Right click on the action item "Reset Material Editor Slots" and click "Edit Macro Script" This brings up a maxscript file that has 3 macros in it. We will edit the reset macro so that it resets the slots. Find this line.
meditMaterials[i] = defaultMtl name:(defaultMtl.localizedName + #'_' as string + i as string)
and replace the defaultMtl with VRayMtl. Press CTRL+S to save that script and CTRL+E to evaluate it. Now just go to the material editor and run the rest command under the utilities menu.
Ta Da! Now save that file out as maxstart.max in your scenes folder and every time you start up, that will be your start up scene. See the Download section for my example maxstart.max file.
(Note: If your having a problem getting the maxstart.max file to load, check to make sure that it's in your default scenes folder. Go to customize>Configure User Paths to figure out where your scenes folder is pointed to.)

